Guide Navigation
Commands for Termux
Run the following commands:
If you want to move the botnet to your phone's internal storage, run the following commands:
The botnet is installed, then you need to configure it.
Follow this guide to configure your botnet
The botnet is installed, then you need to configure it.
Follow this guide to configure your botnet.
To view the exact version of Windows, at the command prompt, type
Also, if you have something gone wrong, you always have the Internet at your fingertips
It is important to open PowerShell with elevated rights. Run in it:

Wait for the download to finish and run.

Restart your computer by pressing Enter.

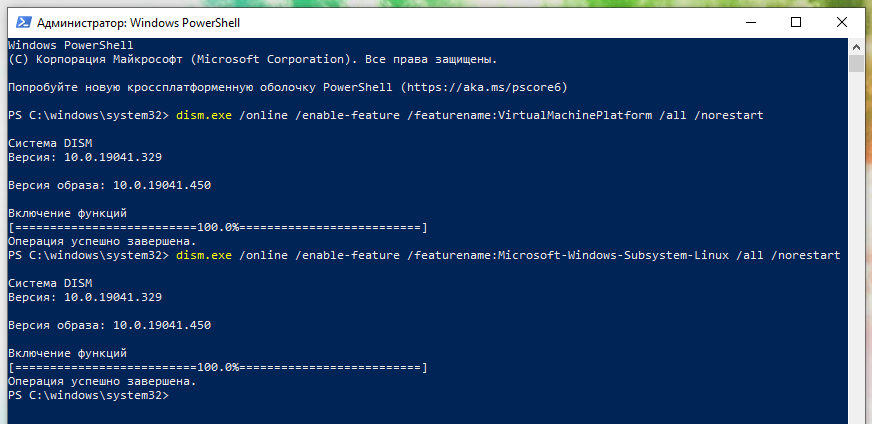
Now open PowerShell again as an administrator and run:

Restart your computer again.
Download and install the latest WSL2 Linux Kernel from here: https://aka.ms/wsl2kernel (direct link).

Open PowerShell again with administrator privileges and run:


After installation, open PowerShell with administrator rights and enter the following command there:

If your Linux environment has version 1 specified, change it to WSL2 with the command:
This completes the installation of WSL2. Let's move on to installing the raid botnet.
Once opened, enter the following commands:
The botnet is installed, then you need to configure it.
The botnet is installed, then you need to configure it.
To install the botnet itself, open the terminal and write the following commands
The botnet is installed, then you need to configure it.
The first line will contain the name of your distribution. Open Google and write there "(your distribution) what is the package manager", then read the instructions for it.
Next, use your package manager to install the python3, git, and pip packages (if it wasn't installed with Python )
Then write the following commands
The botnet is installed, then you need to configure it.
HEADING=3]Botnet Configuration[/HEADING]
In order for the botnet to be configured correctly, we need to get our API ID and API HASH. To do this, you need to create an app on the site my.telegram.org.
First, log in under your account. After authorization, it will show us this intuitive menu:

Go to the API development tools tab, and then create an app there
After you have created your app, you need to copy 2 lines from there: API HASH and API ID

Copy these two lines somewhere in a safe place, they will still be useful to us
To launch a botnet, run the command
If he writes something about the directory, then go to the directory with the botnet with the command
After you launch the botnet for the first time, you will see the botnet setup assistant. Fill in the fields as shown in the screenshot.

Congratulations, you have configured the botnet. Now let's move on to launching it and further configuring it
After executing this command, you will need to enter your account number and confirmation code in order to add your account to the botnet.
If you don't understand something, use a translator, or at least go to the @huis_bn chat and ask there
To switch back to the botnet directory, write the following command
If you have written something related to the directory, just enter it with the command
Congratulations, you have fully configured the botnet and added sessions to it, and now you can use the botnet for its intended purpose

we enter this number in any Telegram client, and then we will receive a login code

If you don't understand the purpose of a particular function, then use Google Translate
Thank you for reading this great article, and have fun raiding!
- Installing a botnet on Android
- Installing a botnet on Linux (Debian-based)
- Installing a botnet on Windows (Wsl2)
- Installing a botnet on Linux (Arch-based)
- Installing a botnet on macOS
- Universal installation on Linux
- Botnet Configuration
- Starting and adding sessions
- FAQ
Installing on Android
Installing programsCommands for Termux
Run the following commands:
Code:
apt update && apt upgrade -y
apt install git python -y
git clone https://github.com/json1c/telegram-raid-botnet.git ~/telegram-raid-botnet
cd ~/telegram-raid-botnet
pip3 install -r requirements.txt
If you want to move the botnet to your phone's internal storage, run the following commands:
Code:
termux-setup-storage
mv ~/telegram-raid-botnet /sdcard/telegram-raid-botnet
The botnet is installed, then you need to configure it.
Follow this guide to configure your botnet
Install on Linux (Debian-based / Ubuntu )
Open a terminal and write the following commands there:
Code:
apt sudo update && sudo apt upgrade -y
sudo apt install git python3 -y
sudo apt install python3-pip
git clone https://github.com/json1c/telegram-raid-botnet.git ~/telegram-raid-botnet
cd ~/telegram-raid-botnet
pip3 install -r requirements.txt
The botnet is installed, then you need to configure it.
Follow this guide to configure your botnet.
Installing a botnet on Windows (WSL2)
Introduction
For this installation, you need Windows 10 version 2004 or higher — this is an update from May 2020, that is, most should already have it installed. If not, then start by updating Windows by clicking Win+i → Update and Security → "Check for updates".To view the exact version of Windows, at the command prompt, type
Code:
winverAlso, if you have something gone wrong, you always have the Internet at your fingertips
Installing WSL2
To enable WSL2 at the command prompt, press Win+x and select "Windows PowerShell (Administrator)" from the menu that opens.It is important to open PowerShell with elevated rights. Run in it:
Code:
Enable-WindowsOptionalFeature -Online -FeatureName Microsoft-Windows-Subsystem-Linux
Wait for the download to finish and run.

Restart your computer by pressing Enter.

Now open PowerShell again as an administrator and run:
Code:
dism.exe /online /enable-feature /featurename:VirtualMachinePlatform /all /norestart
dism.exe /online /enable-feature /featurename:Microsoft-Windows-Subsystem-Linux /all /norestart
Restart your computer again.
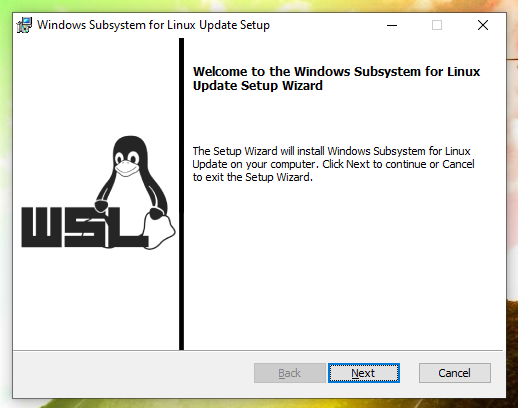
Download and install the latest WSL2 Linux Kernel from here: https://aka.ms/wsl2kernel (direct link).

Open PowerShell again with administrator privileges and run:
Code:
wsl --set-default-version 2
Installing the Ubuntu distribution on WSL2
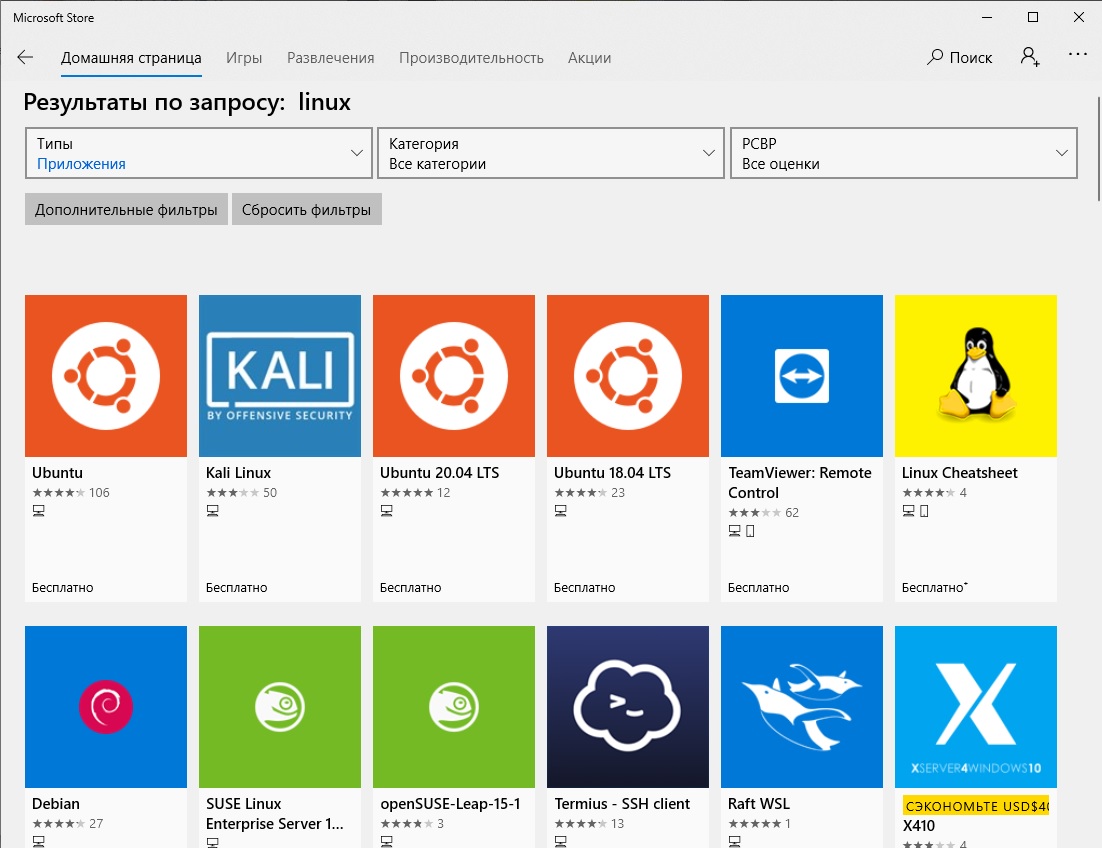
Open the Microsoft Store and enter the word "linux"in the search. Then find the" app " called Ubuntu 20.04 LTS and download it. After installation, restart your computer.
After installation, open PowerShell with administrator rights and enter the following command there:
Code:
wsl --list –-verbose
If your Linux environment has version 1 specified, change it to WSL2 with the command:
Code:
wsl --set-version Ubuntu-20.04 2This completes the installation of WSL2. Let's move on to installing the raid botnet.
Installing a botnet on WSL2
Open the WSL2 terminal. To find it, you can write the word "Ubuntu"in the search.Once opened, enter the following commands:
Code:
apt sudo update && sudo apt upgrade -y
sudo apt install git python3 -y
sudo apt install python3-pip
git clone https://github.com/json1c/telegram-raid-botnet.git ~/telegram-raid-botnet
cd ~/telegram-raid-botnet
pip3 install -r requirements.txt
The botnet is installed, then you need to configure it.
Installing a botnet on Linux (Arch-based)
Open the terminal and write the following commands there
Code:
sudo pacman -Suy
sudo pacman -S python git
sudo pacman -S python-pip
git clone https://github.com/json1c/telegram-raid-botnet.git ~/telegram-raid-botnet
cd ~/telegram-raid-botnet
pip3 install -r requirements.txt
The botnet is installed, then you need to configure it.
Installing a botnet on macOS
To install git, python, use your own package managerTo install the botnet itself, open the terminal and write the following commands
Code:
git clone https://github.com/json1c/telegram-raid-botnet.git ~/telegram-raid-botnet
cd ~/telegram-raid-botnet
pip3 install -r requirements.txt
The botnet is installed, then you need to configure it.
Universal installation on Linux
To find out your package manager, run the command
Code:
cat /etc/*-releaseThe first line will contain the name of your distribution. Open Google and write there "(your distribution) what is the package manager", then read the instructions for it.
Next, use your package manager to install the python3, git, and pip packages (if it wasn't installed with Python )
Then write the following commands
Code:
git clone https://github.com/json1c/telegram-raid-botnet.git ~/telegram-raid-botnet
cd ~/telegram-raid-botnet
pip3 install -r requirements.txt
The botnet is installed, then you need to configure it.
HEADING=3]Botnet Configuration[/HEADING]
In order for the botnet to be configured correctly, we need to get our API ID and API HASH. To do this, you need to create an app on the site my.telegram.org.
First, log in under your account. After authorization, it will show us this intuitive menu:

Go to the API development tools tab, and then create an app there
After you have created your app, you need to copy 2 lines from there: API HASH and API ID

Copy these two lines somewhere in a safe place, they will still be useful to us
To launch a botnet, run the command
Code:
python3 main.pyIf he writes something about the directory, then go to the directory with the botnet with the command
Code:
cd ~/telegram-raid-botnetAfter you launch the botnet for the first time, you will see the botnet setup assistant. Fill in the fields as shown in the screenshot.

Congratulations, you have configured the botnet. Now let's move on to launching it and further configuring it
Starting and adding sessions
To start raiding, we need to add accounts to our botnet. To do this, we exit the current process by pressing Ctrl + C, and run the following command
Code:
cd sessions && python3 add_session.pyAfter executing this command, you will need to enter your account number and confirmation code in order to add your account to the botnet.
If you don't understand something, use a translator, or at least go to the @huis_bn chat and ask there
To switch back to the botnet directory, write the following command
Code:
cd ..How to launch a botnet
The botnet is launched with the following command
Code:
python3 main.pyIf you have written something related to the directory, just enter it with the command
Code:
cd ~/telegram-raid-botnetCongratulations, you have fully configured the botnet and added sessions to it, and now you can use the botnet for its intended purpose
FAQ
What does Initialize sessions mean?- If you answer yes, the botnet's operation will be accelerated by initializing all sessions at once
- This small script will help you log in to the Telegram account that you added to the botnet.
Code:
python3 login.py <session name>
we enter this number in any Telegram client, and then we will receive a login code

If you don't understand the purpose of a particular function, then use Google Translate
Thank you for reading this great article, and have fun raiding!
