
Hacker
Professional
- Messages
- 1,041
- Reaction score
- 851
- Points
- 113
A Wi-Fi jammer, or a Wi-Fi jammer, is a gadget designed to disconnect wireless devices from a hotspot. Why is this needed? You can imagine both a friendly prank (a neighbor, of course, will be glad when you cut off his porn video or, for example, a football match at the most interesting place), and a criminal application: an attacker can disconnect security cameras or other important equipment from the network. In this article, we will analyze what are the inexpensive options for hardware deauthenticators, how to use them, and how to defend against such attacks.
How does the "jammer" work?
Unlike real jammers, which interrupt the signal of the radio transmitter with their stronger signal, the deauthenticator works at the software level. It implements a denial of service attack by sending a deauthentication frame to the router on behalf of the devices connected to the network. Since this frame is not encrypted in any way, it is enough for the jammer to find out the MAC addresses of the devices by sniffing the traffic on the network.Usually, deauthentication is part of a complex network attack. It is used to create an "evil twin" of the access point or to intercept a handshake, which then allows you to decrypt the password. However, a jammer can be useful on its own.
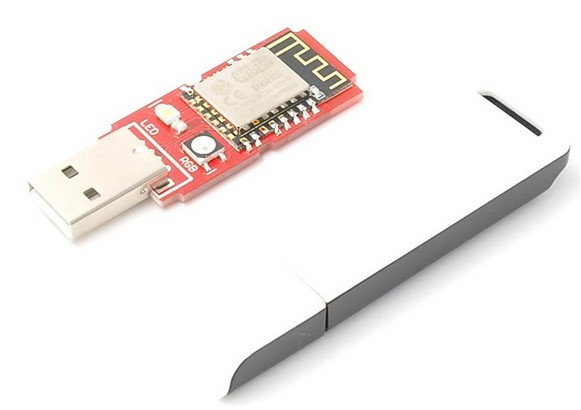
Recently, inexpensive and miniature boards with support for the NodeMCU software platform have become very popular. They are built on the ESP8266 module, which implements work with Wi-Fi using the 802.11b / g / n standard at 2.4 GHz. Now there are two variants of such boards: with the CP2102 chip of the American company Silicon Labs or with the Chinese CH340.All of these tips are highly recommended for educational purposes only. Blocking data transmission and using the considered means may be punishable by law. Penetration testing requires written confirmation from the customer. Remember that deauthorization data is saved in the router logs.

NodeMCU versions
These boards are positioned as devices for prototyping: on their basis, craftsmen create automated systems controlled by Wi-Fi. The topic itself is quite exciting, but we are now interested in something else - the possibility of using NodeMCU to carry out attacks.
Due to technical limitations, the ESP8266 is unsuitable for full monitoring and packet injection, but it can be used as a deauthenticator - which led to the appearance of the corresponding firmware. Last year, a good man with the pseudonym Spacehuhn released the first of these, but since then there have been other versions with additional features. However, before moving on to the software, let's decide on the choice of hardware.
I will demonstrate the process using the example of a board from the Chinese manufacturer Dstike: it has an ESP8266 and has modes of operation as a client (P2P) and an access point (soft-AP). The board can be controlled from a smartphone or any other device with Wi-Fi.
Note that the performance of the software does not depend on the chip or the board - you can choose any option at your discretion. There are several variants of Dstike products in different designs and for use in different situations. All of them have one thing in common - the ability to jam networks.
Varieties of Dstike devices
Deauther Wristband is a bracelet with built-in display, battery and switch. Convenient device for quick access to the control panel.
Portable Jammer
Deauther Power Bank - with modified charge controller; control is carried out through a special panel. The controller has a connector for connecting an external antenna. Batteries are not included. It is a discreet device that can be easily dropped off and used remotely.

Power bank

Charge controller
Deauther OLED V3.5 - in this version you will additionally receive a connector for connecting an external antenna and a holder for a 18650 mAh battery. The device is controlled using buttons and a switch, and the output goes to the screen, which allows you to use this option without additional equipment.

Ready jammer with screen
The main advantage of these gadgets is the ability to select a specific network or all at once within the range of the device. Just in case, you don't need a Wi-Fi password to carry out attacks!
Installing Deauther 2.0
Let's start with Deauther 2.0 - the very firmware that Spacehuhn developed. In its GitHub repository, you can select the version for a specific board.Files with the bin extension are compiled sketches. They need to be installed on the board through a special bootloader. But if you want, then in the archives with the source code you will find libraries and sketches that can be delivered through the Arduino IDE.
Download .bin
If you chose the option with downloading the binary, then first run the NodeMCU Flasher program. You can download it from the NodeMCU repository.Install drivers for CP2102 or CH340. After that, we connect the board to the computer, open the NodeMCU Flasher program, select the COM port in the device manager in the "Ports (COM and LPT)" section. Now go to the Config tab, click on the gear and select the downloaded .bin file.

Program for firmware
After adding a file, its path will appear in the line on the left. Go to the Operation tab and click on Flash - the firmware will then be loaded into the board.
Uploading via Arduino IDE
If it's more convenient for you to install through the Arduino IDE, then the process is slightly different. First of all, download the drivers in the same way (CP2102, CH340). Then open the Arduino IDE and in the "File" menu, look for "Settings", click on "Add a link for the board manager" and insert two links:- http://arduino.esp8266.com/stable/package_esp8266com_index.json
- http://phpsecu.re/esp8266/package_deauther_index.json

Adding links
Open the "Tools" tab and select the "Board Manager" item from the "Board: ..." menu.

Adding boards
We select "Entered" and set arduino-esp-8266-deauther and esp8266.

Installing packages
Open the folder with the sketch and libraries, go to "Tools". The settings should be like mine in the screenshot.
In the line "Board" select ESP8266 Deauther Modules from the list.

Download firmware
In the Flash size line, select our module. Set the firmware and the amount of memory as in the picture below.

Module versions
Next, download the firmware.
After switching on, the board will create an access point. Connect to it and go to 192.168.4.1 or deauth.me. You will be taken to the configurator and you will see a warning.
In the configuration section, in the LANG line, specify ru to enable the Russian language in the web interface. For the settings to take effect, you need to click on "Save" and restart the device. Now it is ready to go, you can start spoiling the life of your neighbors.
Overview of features and settings
Let's quickly go through the application and see what our headscarf is now capable of.If you connect a jammer via a serial port, then using commands you can control the jammer. This function can be disabled in the settings by unchecking the SERIAL checkbox.
Serial Commands
- scan [<all/aps/stations>] [-t <time>] [-c <continue-time>] [-ch <channel>]
- show [selected] [<all/aps/stations/names/ssids>]
- select [<all/aps/stations/names>] [<id>]
- deselect [<all/aps/stations/names>] [<id>]
- add ssid <ssid> [-wpa2] [-cl <clones>]
- add ssid -ap <id> [-cl <clones>] [-f]
- add ssid -s [-f]
- add name <name> [-ap <id>] [-s]
- add name <name> [-st <id>] [-s]
- add name <name> [-m <mac>] [-ch <channel>] [-b <bssid>] [-s]
- set name <id> <newname>
- enable random <interval>
- disable random
- load [<all/ssids/names/settings>] [<file>]
- save [<all/ssids/names/settings>] [<file>]
- remove <ap/station/name/ssid> <id>
- remove <ap/station/names/ssids> [all]
- attack [beacon] [deauth] [deauthall] [probe] [nooutput] [-t <timeout>]
- attack status [<on/off>]
- stop <all/scan/attack>
- sysinfo
- clear
- format
- print <file> [<lines>]
- delete <file> [<lineFrom>] [<lineTo>]
- replace <file> <line> <new-content>
- copy <file> <newfile>
- rename <file> <newfile>
- run <file>
- write <file> <commands>
- get <setting>
- set <setting> <value>
- reset
- chicken
- reboot
- info
- // <comments>
- send deauth <apMac> <stMac> <rason> <channel>
- send beacon <mac> <ssid> <ch> [wpa2]
- send probe <mac> <ssid> <ch>
- led <r> <g> <b> [<brightness>]
- led <#rrggbb> [<brightness>]
- led <enable/disable>
- draw
- screen <on/off>
- screen mode <menu/packetmonitor/buttontest/loading>
If you click Scan APs in the scan section, then the jammer finds all Wi-Fi access points. You select one or several networks, and you can go to the attack section. Deauth mode disconnects all devices from the selected network. Beacon mode allows you to create up to 60 access points at the same time.
Scanning and types of attacks In the SSIDs section, access points for the Beacon attack are created.
The firmware provides the ability to connect a display - for the version of the device with it. But if you wish, you can solder the screen and buttons to the board yourself, as well as provide autonomous power supply to turn it into an independent device.
Also, the developers of the firmware, in addition to the jammer itself, also sell a device that allows it to be detected.

Detector
The authors periodically update the firmware and add new features, so stay tuned!
Wi-PWN
Consider a similar Wi-PWN firmware developed by Sam Denty (samdenty99). He improved on Spacehuhn's creation and added deauthentication detector features and also created a companion app for Android. As a result, using Wi-PWN is more convenient than Deauther 2.0.After downloading and unpacking the archive, you will need to flash the board and install the application on your phone. In the folder you will find the ESP8266Flasher program. Run it, select the COM port and in the Config section - the firmware (it is on the way *\Wi-PWN-master\arduino\Wi-PWN). Now click Flash in the Operation tab.
We connect to the board via Wi-Fi from the phone.
We open the downloaded application, agree with the rules, indicate the name and password of the network. After setting up, we connect to the new Wi-Fi.


Configuring the access point and completing the installation The application has several tabs with self-explanatory names:
- Scan - section with search and selection of several access points;
- Users - the function of scanning a specific Wi-Fi for connections and creating your own "users";
- Attack - attacks are similar to the Spacehuhn version, but when cloning networks, the maximum number of users is 48 instead of 60 (this was the case in earlier versions of Deauther);
- Detector - a function that allows you to scan channels and identify jammers;
- Settings - setting the Wi-Fi server (name, password of the network). Here you can also enable the Wi-Fi client and configure the scan and attack settings.
WARNING!
For stable operation of the device, I recommend attaching the radiator to the heating part of the device. Otherwise, the jammer may overheat and turn off.A few words about protection
NodeMCU is a cheap, versatile, powerful and compact deauthentication solution. You can repeat the entire project quickly and effortlessly. And since anyone can do it, it's a good idea to think about protection as well.Most popular routers use the IEEE 802.11b / g / n standards, which are prone to jamming. If you want to eliminate this possibility, then look for a router with support for the 802.11w standard that fully protects users from this attack.
Some routers have anti-spam protection, but it only works with devices connected to the network, and the Wi-Fi jammer does not connect to the network. If your router has anti-spam protection that works with unconnected devices, then I advise you to activate it!